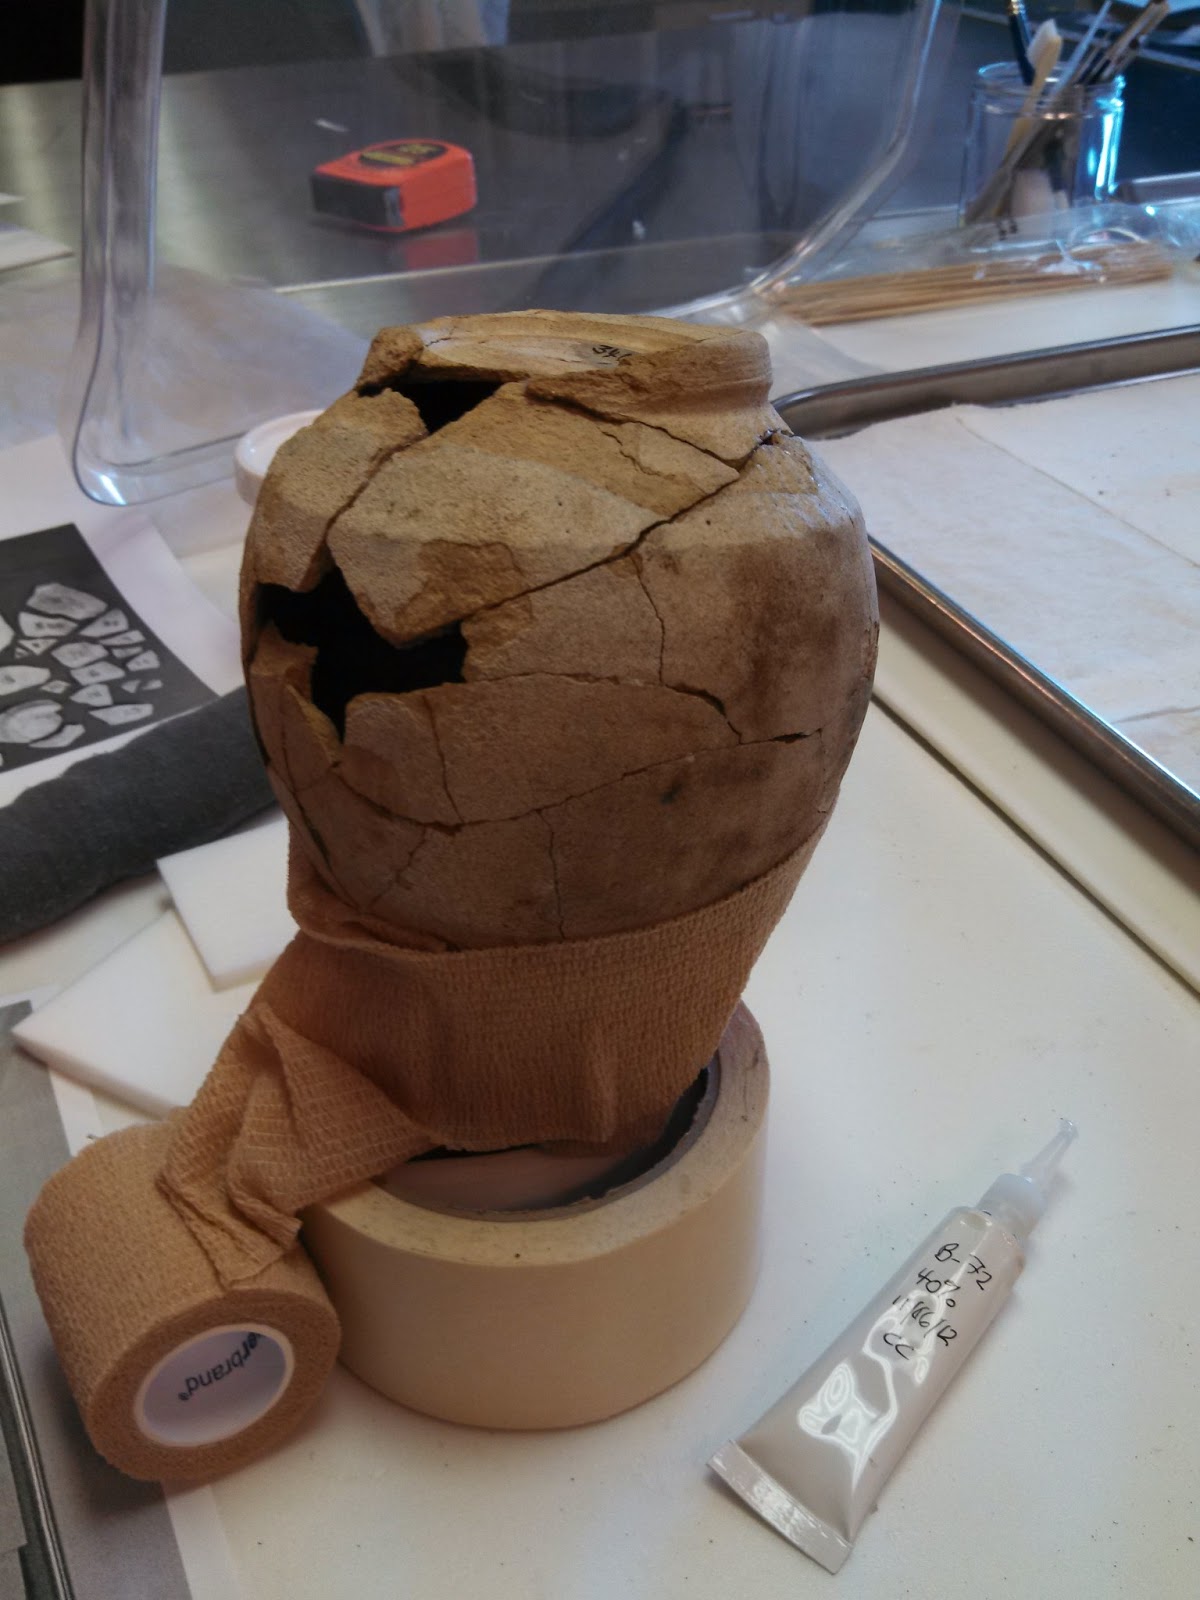
Three weeks after I started working on the Parthian jug, I was finally able to put it back together. I started by making up a plan for the order of joining the pieces. Because there were pieces missing on the bottom and the fabric was weaker, I started at the neck of the jug and worked my way down. One has to pick a side, typically the base, because often gaps will arise and it is better to put the excess space between the pieces at the end, rather than having an awkward or unstable seam in the middle. For this reason also I did not put together pieces independently and then try to join them. This technique of working quickly to reconstruct the entire ceramic at once does not seem to be very common. Instead, conservators will join pieces and let them dry before moving on. This way was quick, it allowed the structure to support itself, and any issues with fit were dealt with before the adhesive was entirely set.
The inversion, and the fact that the rim is entirely missing, meant that I had to create a cushioned support around the neck, which I did by placing it in a ring of tape and padding it with styrofoam. At the bottom, I also used self-adhesive bandages to keep the right amount of pressure on the sherds so that they would not fall outwards before I got the higher pieces in place. As much as possible, I worked in registers so that the piece could support itself as I glued pieces on. As I went higher, the sherds were held together by gravity and the lower pieces.
The adhesive that I used was 40% Paraloid B-72. I placed a thin line along one edge to be joined, then placed the piece. I took it off to check to make sure the adhesive got on both sides, indicating a good connection, then I placed it permanently. I was pleasantly surprised how strong the adhesive was and how quickly it set. Even working at an angle, I did not have to hold the pieces in place once I adhered them. I had used a diluted solution of the same adhesive to consolidate and seal the edges of the pieces. Because of the added layer of consolidation, the sherds did not always feel like they fit exactly together. I also had some minor issues with sherds not wanting to match up perfectly with surrounding pieces when placed, but applying pressure to the sherds already glued together allowed me to gently move the pot into position.
In the end, it came together. The finished jug has a few gaps on the neck, body, and base, but structurally these probably do not need to be filled. There are also three sherds that I was unable to place. One may not go to this pot, as it is too big to place in any of the gaps. The other two do not have matching edges with any of the remaining pieces, so although I can estimate where they would go, I did not glue them on.
One of the cool things about reconstructing this pot, besides being able to see its actual shape, is that the shatter pattern let's me guess how the pot was broken. It looks like it was dropped or crushed on its side with the handle almost downward. The damage is particularly bad on the body and base of the jug on the side shown in the second picture below. Overall, the reconstruction was relatively quick and quite fun. I definitely would like to work with ceramics again.


No comments:
Post a Comment